Complete guide to help you get started and make the most of WooVoucher
WooVoucher – Greek Web Services for WooCommerce is a plugin made to connect greek courier web services with WooCommerce.
Supports
Upload the plugin using ftp under wp-content/plugins directory and enable the plugin under Plugins.
Alternatively upload directly the zipped file from WordPress Backend by going to Plugins->Add New -> Upload Plugin
WooVoucher – Greek Web Services for WooCommerce is a plugin made to connect greek courier web services with WooCommerce.
Supports
After enabling the plugin you have to configure it for first time, so let’s start by going to WooCommerce->Settings -> Courier Web Services.

After clicking to Courier Web Services Tab you will see the following options to configure each courier.
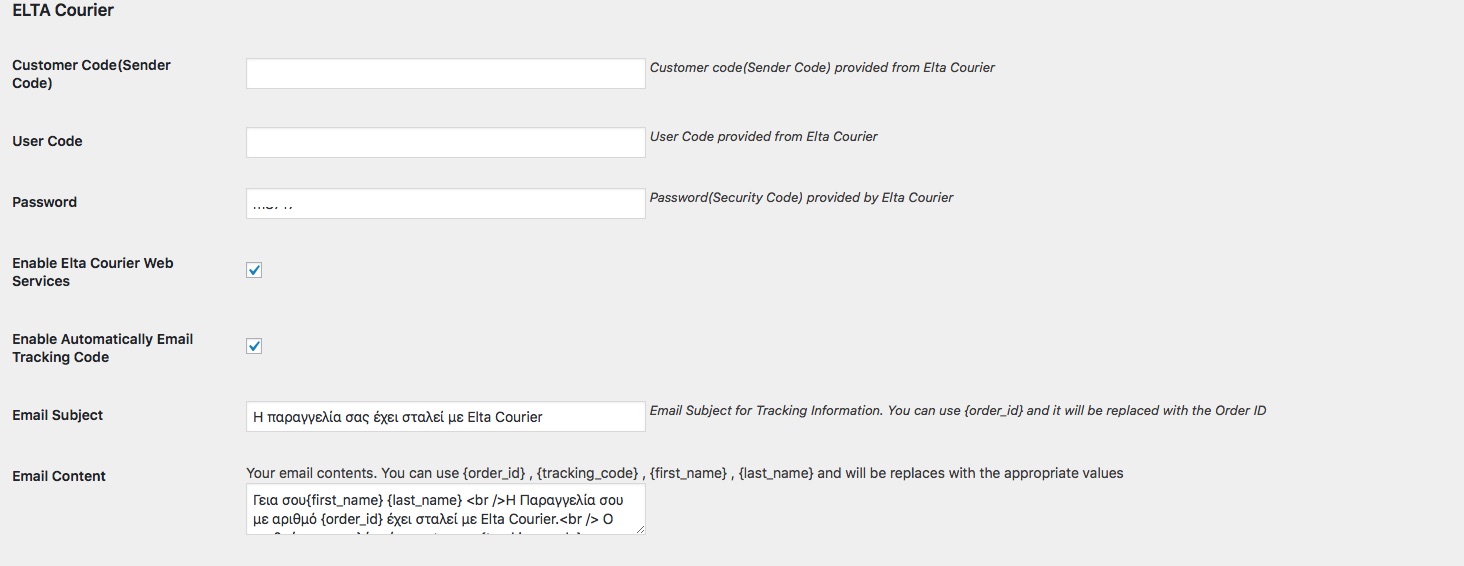
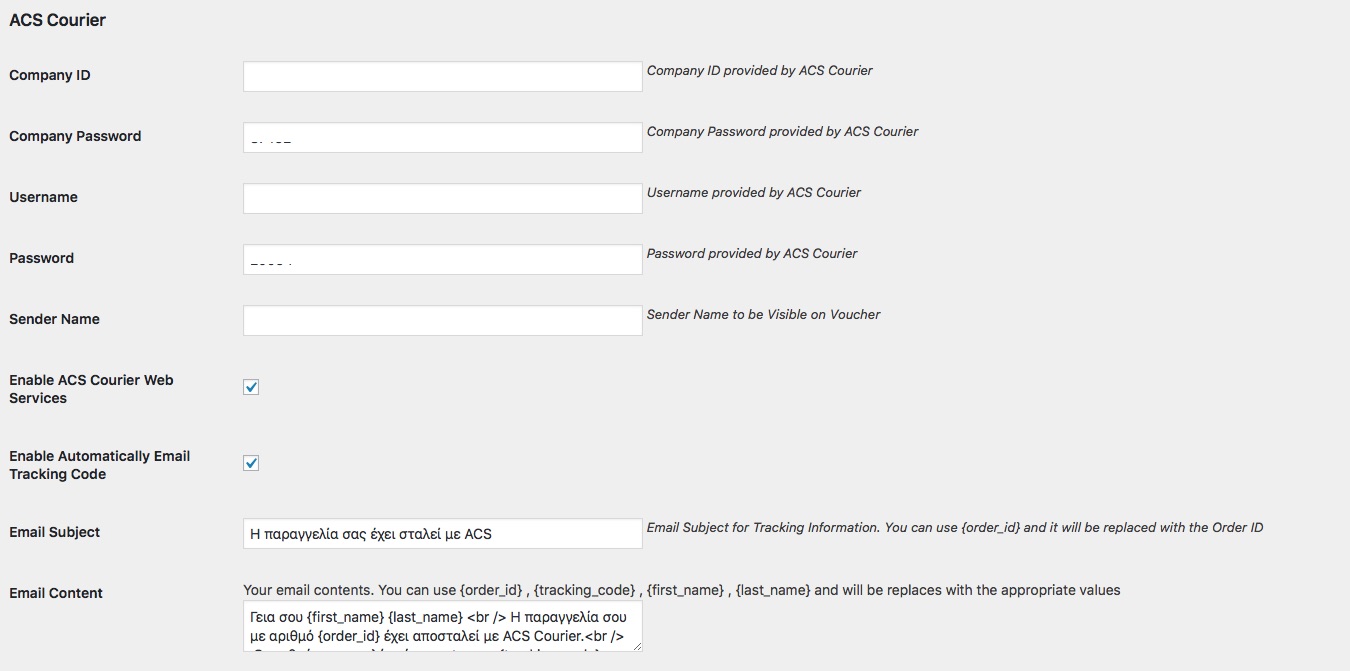
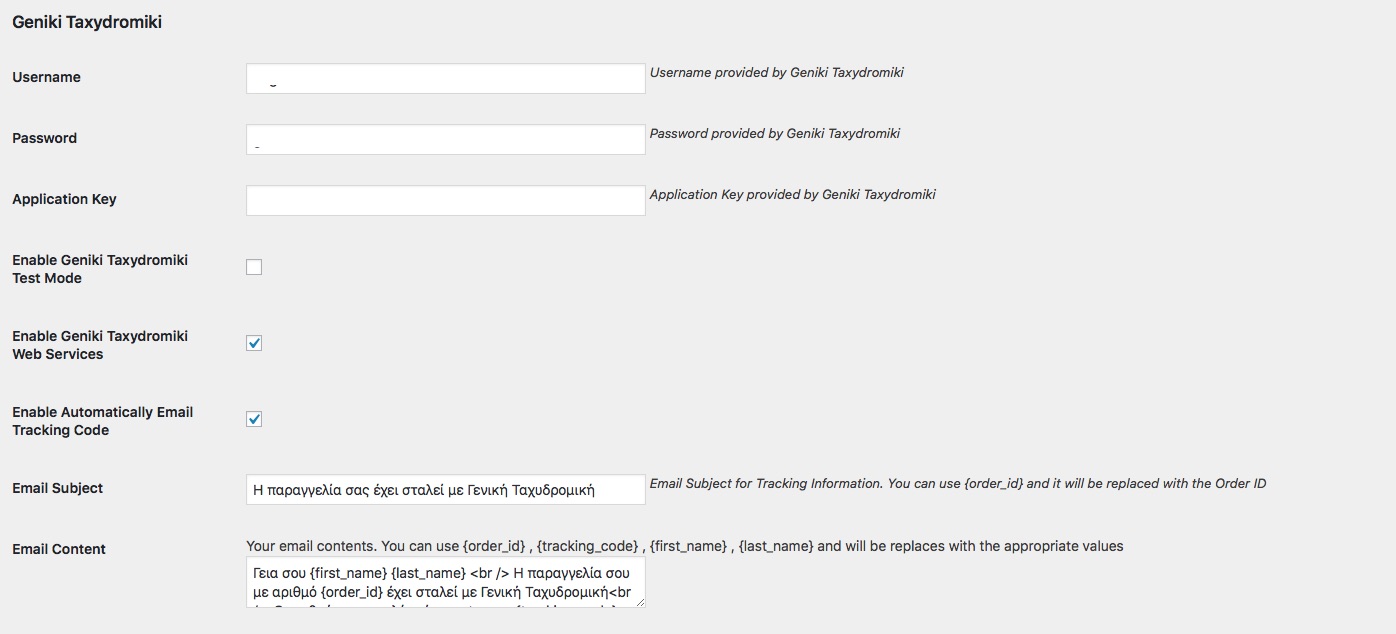
Complete all the settings from the courier you want to enable web services. Also enable the test mode to make the initial tests as Courier require .
*Please enable only the courier that you are actually using their Web Services.
You will notice also that you have the option to send automatically the tracking code by email. (This happens when you create the voucher and after that mark the order as Completed).
You can change also the email subject and email content with your content for each courier and use {order_id} , {tracking_code} , {first_name} , {last_name} and will be respectively replaced.
Now le’ts navigate to WooCommerce->Orders

You will notice that 3 new columns added (Voucher, Courier, Tracking) .
On first column voucher is a button that when hover it dropdown the available courier to generate , print , cancel or trace the voucher.
The second column is displaying the courier we generated voucher for this order while the third column displaying the tracking number generated from the courier.
Now let’s generate a voucher for our new order

I will now select to generate a voucher using Elta Courier and the following popup appears

I see that my voucher is generated . Now i can select to print the voucher as A4 or as A6(this is for the label printer).
Let’s do this also.
Note: On first time when you try to click on print your browser may try to block the popup . You must select to allow this popup for this site and add it as exception.

You can print the voucher normally by pressing the Print Voucher button. I hide sensitive information on this screenshot for obvious reasons.
Now let’s trace the voucher we just generated by pressing Trace Voucher.
We will see this
![]()
The Trace Voucher returns at the moment only one status. It will be display more after getting updated from Courier Agents and you will be able to see exactly the status and if this order has been sucesfully delivered or not by the courier..
Now let’s see also the Cancel Voucher option as you may want to cancel a voucher for any reason.
By pressing this button you should get a message that Voucher Canceled like the following screenshot
![]()
Note: if you get a message that cannot be canceled this may because you have finalized or you have closed the pending jobs as Geniki Taxydromiki, ACS and Speedex requires..
Note for ACS: If you are using ACS Courier you cannot cancel a voucher after creating a mass number. You can cancel the voucher before creating the mass number ACS Requires.
Note for Geniki Taxydromiki: If you are using Geniki Taxydromiki you cannot also cancel a voucher if you pressed Close Pending Jobs Under WooCommerce -> Geniki Taxydromiki .
Note for Speedex: You are not able also to cancel a voucher if you selected to print the pdf for today orders under WooCommerce – > Speedex
Notes for each Courier
Lets see some notes for each Courier.
ACS Courier
Speedex
Geniki Taxydromiki
When the voucher is generated as COD(Cash On Delivery)?
The voucher is generated as COD when it actually customer ordered and selected COD as payment method.
Otherwise the COD amount on voucher is 0 (if paid by credit card for example).
Are the customer notes included on Voucher?
Yes , all customer notes included on voucher. You can always edit the order and keep only the comment you want to be visible if the customer note is too long or contains something you want to not be visible on voucher.
When the customer receives by email the tracking code?
Customer receives automatically the email with tracking code after you mark the order as completed. You must generate the voucher before marking the order as completed .
If you couldn't find the information you were looking for in this documentation, our support team is here to help you.
Create a support ticket and our team will respond as soon as possible.
Submit Ticket