Enhancing your website with an online food ordering system has never been easier, thanks to the WooFood plugin. This versatile tool allows you to seamlessly integrate a customized food menu into your website, complete with a user-friendly interface that lets you style your menu to match your brand.
Step 1: Install WooCommerce
To begin crafting your tantalizing food menu using WooFood, the first step is to install the WooCommerce plugin. Once WooCommerce is up and running, you’re ready to start adding your delicious offerings to the menu.
Step 2: Crafting Your Food Menu
Let’s dive into creating your menu items as products. Navigate to “Products” and select “Add New.”
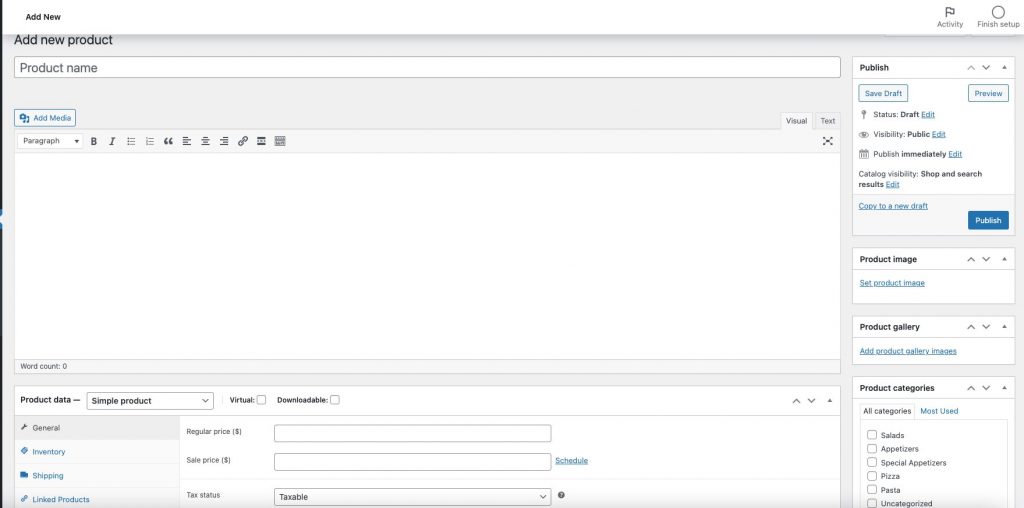
Choosing the Right Product Type
There are two main product types: Simple and Variable Products. The choice depends on the flexibility you want to offer your customers.
- Simple Product: Opt for this type if your menu item is fixed and doesn’t require any customizable options like size or toppings.
- Variable Product: This is your go-to if your menu items are adjustable. It enables you to create variations of a product with different prices, perfect for items like pizzas with varying sizes and prices.
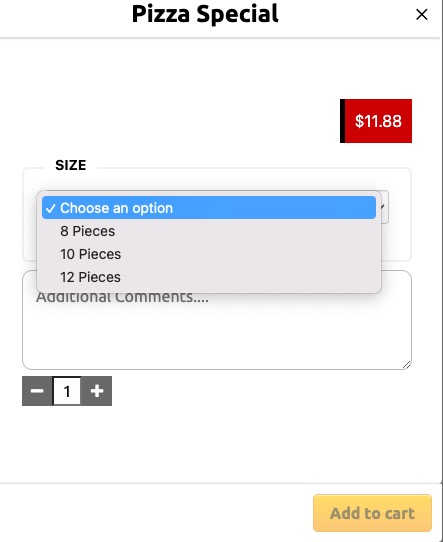
On the above example a Pizza item is a variable product with 3 Size variations and different pricing on each variation . Let’s see also how a variable product look like on the backend side and how it’s configured
Step 3: Defining Attributes

Before creating variations, set up attributes like “Size.” Under the “Values” option, list attributes separated by “|” (pipe). Don’t forget to check “Used for variations” to enable further customization.
Step 4: Creating Variations
Head to the “Variations” tab. Instead of crafting variations one by one, use the “Create Variations from all attributes” dropdown option. Confirm the creation of variations when prompted.

To do it , you will have to select from the dropdown option the option “Create Variations from all attributes“. Press the “Go” button. After that the system will ask you for confirmation if you want to create 3 variations and you will press “Ok” to confirm it.
After that your variations will like this

Step 5: Pricing Your Variations
Expand the variations options and set the pricing for each. Simply press the small “arrow-down” icon, then input your prices. Don’t forget to save your changes.
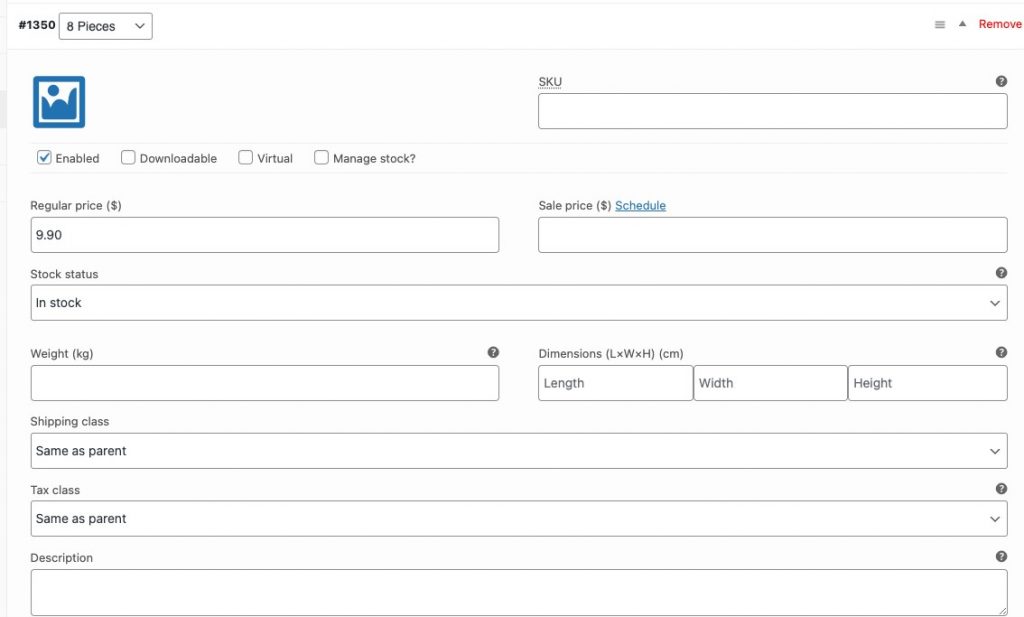
After settings all the prices by setting on the regular field the price you want. Don’t forget to press the “Save changes” button on the bottom of the variations .
Step 6: Adding Extra Options
While WooCommerce doesn’t inherently support add-ons like toppings, you can extend its functionality with the WooFood plugin.
Creating Extra Option Categories
Go to WooFood > Extra Options Management and click “New Extra Option Category.“
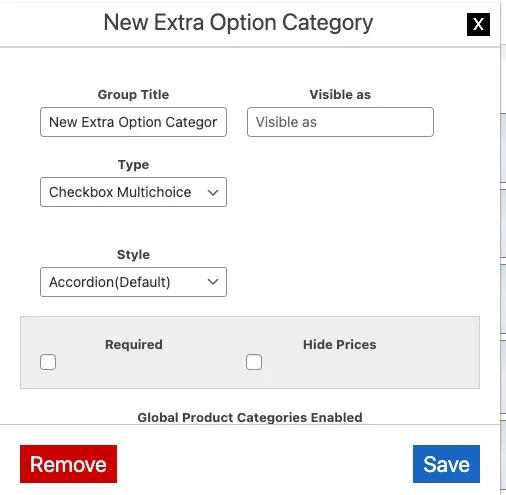
Group Title
On the Group Title type the name you want to appear on the top of the extra options, like “Sides”, “Sauces” etc..
Visible As
This option allow you to display a different Group Title to the frontend customers and have the Group title option for internal use. Very handy option if you have too many extra option categories with the same visible name and different internal
Type
Checkbox Multi-choice : Select this option if you want to offer multiple selections of extra options with no restrictions on the number of options .
Limited Choice: It’s exactly like the multi-choice with the only different that you can limit the maximum number of selections by setting the Maximum Options field to the maximum number of choices that allowed to be selected .
Single Choice Radio: Radio button options with single choice select . Ideally suits best to an option like “Roasting” when a single option is allowed for selection . (“Rare”, “Medium”, “Well”)
Single Choice Select: Same behaviour like single choice radio but in Dropdown option instead of radio buttons .
Style
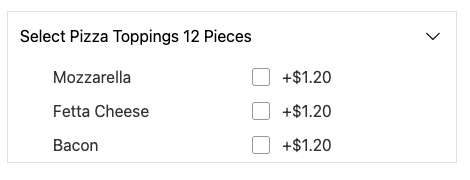
Styling option has 2 different options , “Accordion” and “Flat”.
Accordion: Extra Options will appearing inside a collapsed accordion . Ideal solution if you have more than 1 extra option categories assigned to the product

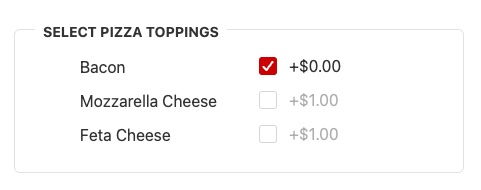
Flat: As the name says, flat option will display extra options with a flat display format like on the following picture. Mainly used when only one extra option category is per product.
Assigning Extra Options on a Variable Product
Navigate to Product Edit and go inside Variations Tab. You will see a screen where you can select the extra option categories you have created before to the variation.

Select all the Topping groups you want to appearing on this variation. You can always select different extra options for each variation.
More Options for your Food Menu
Our Food Delivery Plugin, WooFood, having too many options and very useful for your operation like the following.
- Delivery Hours
- Takeaway Option
- Distance Restriction
- Automatic Order Printing